How to Replace Ink Cartridges in Canon PIXMA MG3620
Replacing an ink cartridge in the Canon PIXMA MG3620 is straightforward when the cartridge holder, locking lever, protective tape, and cartridge positions are handled correctly. This guide walks through the replacement process and explains what to check if the printer does not recognize the newly installed cartridge.
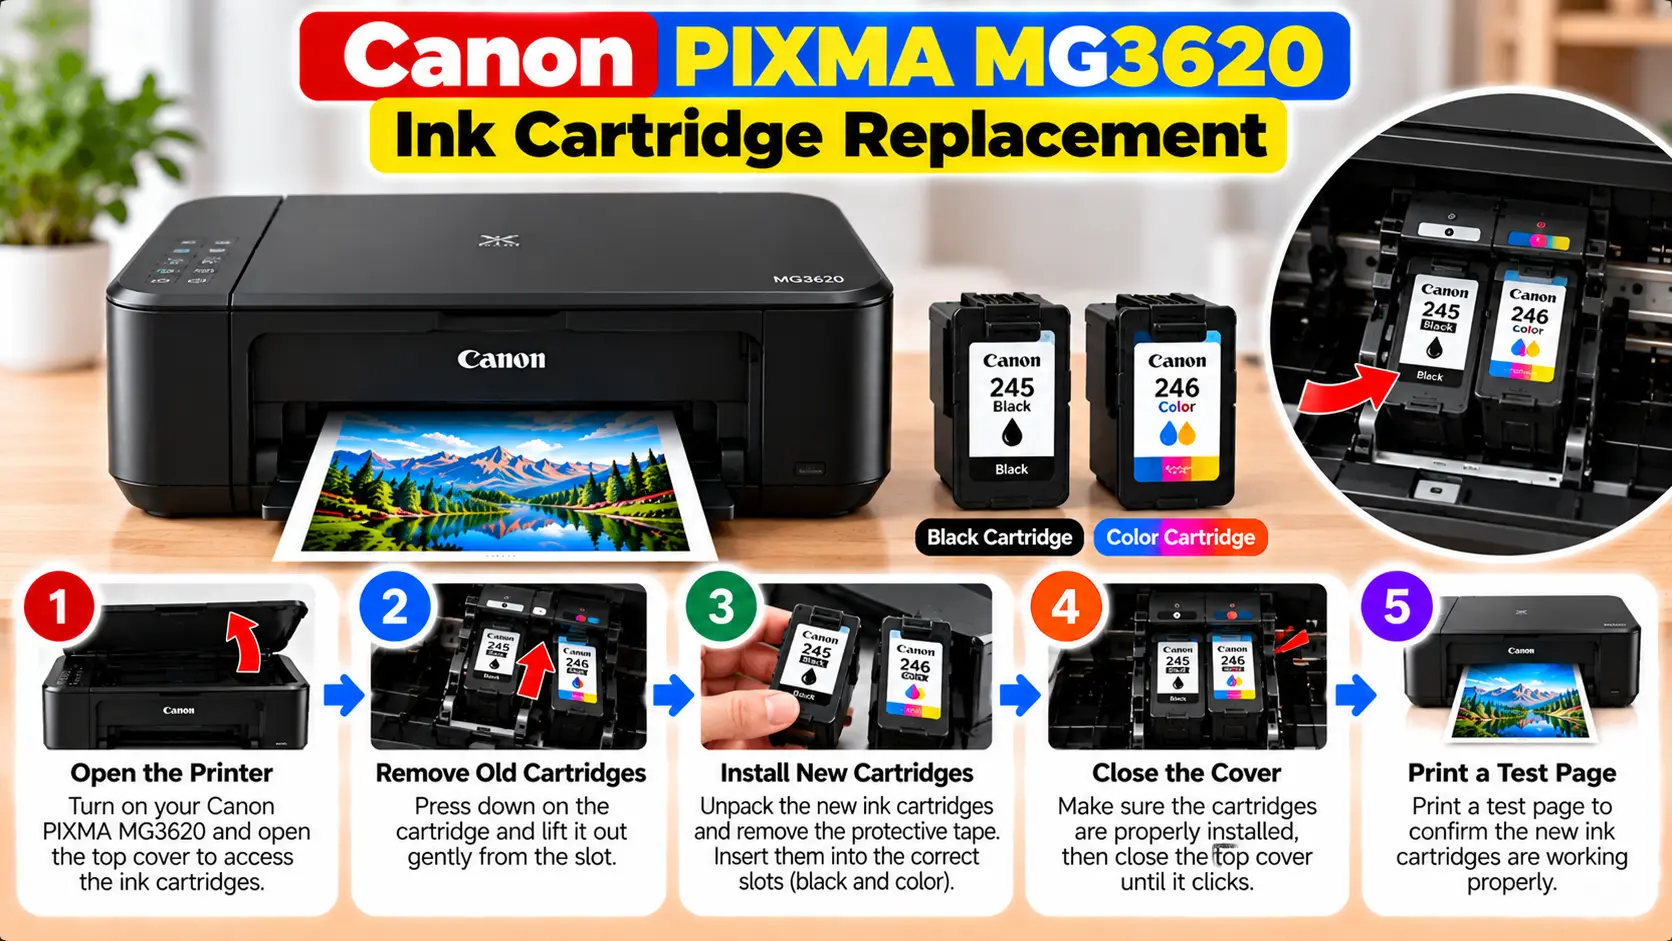
How Do You Change Ink in a Canon MG3620?
Keep the printer turned on, open the front cover and paper output tray, and then open the paper output cover. Wait until the FINE cartridge holder stops at the replacement position. Release and remove the old cartridge, remove the protective tape from the new cartridge, insert it into the correct slot, lock it in place, and close the paper output cover.
Before Replacing the Canon MG3620 Ink Cartridge
Before opening the printer, prepare the replacement cartridge and place the printer on a stable surface. Keep paper, clothing, and other items away from areas where ink could accidentally transfer.
During the replacement procedure, keep these precautions in mind:
- Keep the printer powered on while moving the cartridge holder into its replacement position.
- Do not force the cartridge holder to move.
- Wait until the holder stops completely before touching the cartridge area.
- Avoid touching metallic parts inside the printer.
- Handle the new cartridge carefully to avoid ink stains.
- Do not touch the electrical contacts or print-head nozzle on the FINE cartridge.
How to Replace Canon PIXMA MG3620 Ink Cartridges
Step 1: Make Sure the Printer Is Turned On
Confirm that the Canon PIXMA MG3620 is powered on before beginning the cartridge replacement procedure.
Step 2: Open the Front Cover
Open the front cover and pull out the paper output tray.
Step 3: Open the Paper Output Cover
Open the paper output cover. The FINE cartridge holder should move toward its replacement position, and the head cover opens automatically.
Wait until the cartridge holder has completely stopped moving.
Step 4: Release the Old Cartridge
Push down the ink cartridge lock lever for the cartridge you want to replace until the mechanism releases.
Step 5: Remove the Old FINE Cartridge
Carefully remove the old cartridge from the holder. Keep it away from clothing, furniture, and other surfaces that may be stained by ink.
Dispose of the used cartridge according to applicable local requirements for consumables.
Step 6: Prepare the New Cartridge
Remove the new FINE cartridge from its package and gently remove its protective tape.
After removing the tape:
- Do not put the protective tape back on.
- Do not shake the cartridge.
- Do not touch the electrical contacts.
- Do not touch the print-head nozzle.
Step 7: Insert the New Cartridge
Insert the FINE cartridge straight into its correct holder until it reaches the back of the holder.
Insert it gently so the cartridge does not strike the electrical contacts inside the holder.
Step 8: Lock the Cartridge
Push the ink cartridge lock lever upward until the cartridge is securely locked into place.
Check that the cartridge is seated correctly before closing the printer.
Step 9: Close the Paper Output Cover
Close the paper output cover after the cartridge is securely installed.
If an Alarm lamp lights or flashes after the cover is closed, check the printer's indicated error before attempting to print.
Which Side Does Each MG3620 Cartridge Go On?
Installing the cartridges in the correct positions is essential.
| Cartridge | Position |
|---|---|
| Color FINE Cartridge | Left slot |
| Black FINE Cartridge | Right slot |
Canon specifies that both the color and black FINE cartridges should be installed in the printer.
What Happens After Installing a New Cartridge?
After cartridge replacement, the printer may perform maintenance when printing begins. Allow the printer to complete its operation before interrupting it or starting another maintenance procedure.
Once the printer is ready, print a simple test document and inspect:
- Black text quality
- Color output
- Missing lines
- Unexpected blank areas
- Alignment problems
If printed lines appear misaligned, use the appropriate print-head alignment procedure rather than repeatedly removing and reinstalling the cartridge.
Canon MG3620 New Ink Cartridge Not Recognized
If the printer reports an ink or cartridge problem after replacement, first inspect the installation rather than immediately assuming the printer is defective.
Check the Cartridge Position
Confirm that the color cartridge is installed on the left and the black cartridge is installed on the right.
Check the Lock Lever
Make sure the cartridge is inserted completely and the cartridge lock lever has secured it in place.
Check for Protective Tape
Verify that the protective tape was completely removed from the new cartridge. Remaining tape can interfere with ink output.
Check the Displayed Error
If the Alarm or ink lamps are flashing, note the number and pattern of flashes. The flashing pattern can indicate the type of problem that needs to be addressed.
New Cartridge Installed but Print Quality Is Poor
A cartridge installation problem and a print quality problem are not always the same thing. If the printer accepts the cartridge but the printed page has missing colors, lines, or uneven output, use the printer's normal maintenance procedures.
Depending on the symptom, this may include:
- Printing a nozzle check pattern
- Running normal print-head cleaning when needed
- Checking cartridge installation
- Performing print-head alignment when output is misaligned
Avoid running repeated cleaning cycles without reason because maintenance operations consume ink.
Common MG3620 Cartridge Replacement Mistakes
| Mistake | Better Approach |
|---|---|
| Forcing the cartridge holder | Keep the printer on and wait for the holder to reach the replacement position and stop. |
| Installing cartridges in the wrong slots | Color goes on the left and black goes on the right. |
| Touching electrical contacts | Hold the cartridge carefully without touching the contacts or nozzle. |
| Leaving protective tape attached | Remove the protective tape before installing the cartridge. |
| Forcing the head cover open | Allow it to open automatically as part of the replacement procedure. |
| Removing the other cartridge | Keep both black and color cartridges installed. |
Related Canon PIXMA MG3620 Guides
Frequently Asked Questions
How do I replace ink in a Canon PIXMA MG3620?
Keep the printer on, open the front cover, paper output tray, and paper output cover, wait for the cartridge holder to stop, remove the old FINE cartridge, prepare and install the new cartridge, lock it in place, and close the paper output cover.
Which side does the black cartridge go on in the MG3620?
The black FINE cartridge goes in the right slot. The color FINE cartridge goes in the left slot.
Should I turn off the MG3620 before changing ink?
Canon's MG3600-series replacement procedure starts with the printer powered on so the cartridge holder can move to its replacement position.
Can I move the MG3620 cartridge holder by hand?
Do not force or manually stop the FINE cartridge holder. Wait until it moves to the replacement position and completely stops.
Why is my new MG3620 cartridge not printing?
Check that the cartridge is in the correct slot, fully installed and locked, and that its protective tape has been removed. If an error lamp is flashing, identify the indicated error before continuing.
Can I touch the contacts on a Canon FINE cartridge?
Avoid touching the electrical contacts and print-head nozzle because doing so can affect printing.
Final Cartridge Replacement Checklist
- Printer was powered on during replacement.
- Cartridge holder was allowed to stop by itself.
- Old cartridge was removed carefully.
- Protective tape was removed from the new cartridge.
- Electrical contacts and nozzle were not touched.
- Color cartridge is installed on the left.
- Black cartridge is installed on the right.
- Cartridge lock lever is secured.
- Both cartridges are installed.
- Paper output cover is properly closed.